Setting Up the Cron Job
A cron job is essential for automating recurring tasks in Aikeedo, particularly for renewing subscription usages.Frequency and Interval
- Renewal Period: Subscription usages are renewed every 30 days.
- Recommended Interval: The cron task should run once per minute for optimal performance.
Some servers may limit cron tasks to a minimum interval of 15 minutes. In such cases, subscriptions will still renew, but there might be a slight delay of up to 15 minutes.
Configuring the Cron Task
It is important that the cron job runs as the same user that your web server uses to serve your Aikeedo application. On many Linux systems, this user is typicallywww-data (for servers running Apache or Nginx), but it may differ depending on your server setup (for example, apache, nginx, or another user). Running the cron job as the correct user ensures that file permissions and environment variables are consistent with your web server, preventing potential permission issues.
How to Set Up the Cron Job for the Web Server User
-
Determine the Web Server User:
- On most systems, the user is
www-data. - You can check the running user with:
- Look for the user column in the output.
- On most systems, the user is
-
Edit the Crontab for the Web Server User:
Use the following command, replacingwww-datawith your web server user if different:This opens the crontab editor for the specified user. -
Add the Cron Entry:
Add the following line to the crontab:Replace/path/to/app/root/with the actual path to your Aikeedo application’s root directory.
If your server uses a different user for the web server (such as
apache or nginx), substitute www-data with the appropriate username in the sudo crontab -u USERNAME -e command.Important: File Permissions and Cache Issues
While it is technically possible to run the cron job asroot or another user, this is not recommended. If the cron job runs as a different user than your web server (for example, as root), the application may create new files in the app cache with incorrect ownership. This can cause issues when you try to clear the cache from the Aikeedo admin panel (Status page).
-
How to Detect the Issue:
When you clear the cache from the Status page, you should see a success message in the toast notification. If you do not see a success message, it likely means the app is unable to clear the cache due to file permission issues. -
How to Fix:
To resolve this, reset the ownership of your app files to the web server user (e.g.,www-data) by running:Replace/path/to/app/rootwith the actual path to your Aikeedo application’s root directory. After fixing the permissions, ensure the cron job is running as the correct user to prevent this issue from recurring.
Troubleshooting Cron Issues
If you encounter problems with subscription renewals:- Verify the cron task configuration is correct
- Check your server logs for error messages related to the cron job
- Ensure the PHP path (
/usr/bin/php) is correct for your server - Verify file permissions are correct for the web server user
Configuring Your Site Domain
Properly setting your site domain is crucial for system functionality.Steps to Set Your Site Domain
- Access the Admin Panel: Log in to your Aikeedo admin dashboard.
- Navigate to Settings: Click on Settings in the sidebar, then select General.
- Locate the “Site Domain” Field: You’ll find this in the Website section.
- Enter Your Domain: Input your domain name without the protocol (http:// or https://) and without any paths.
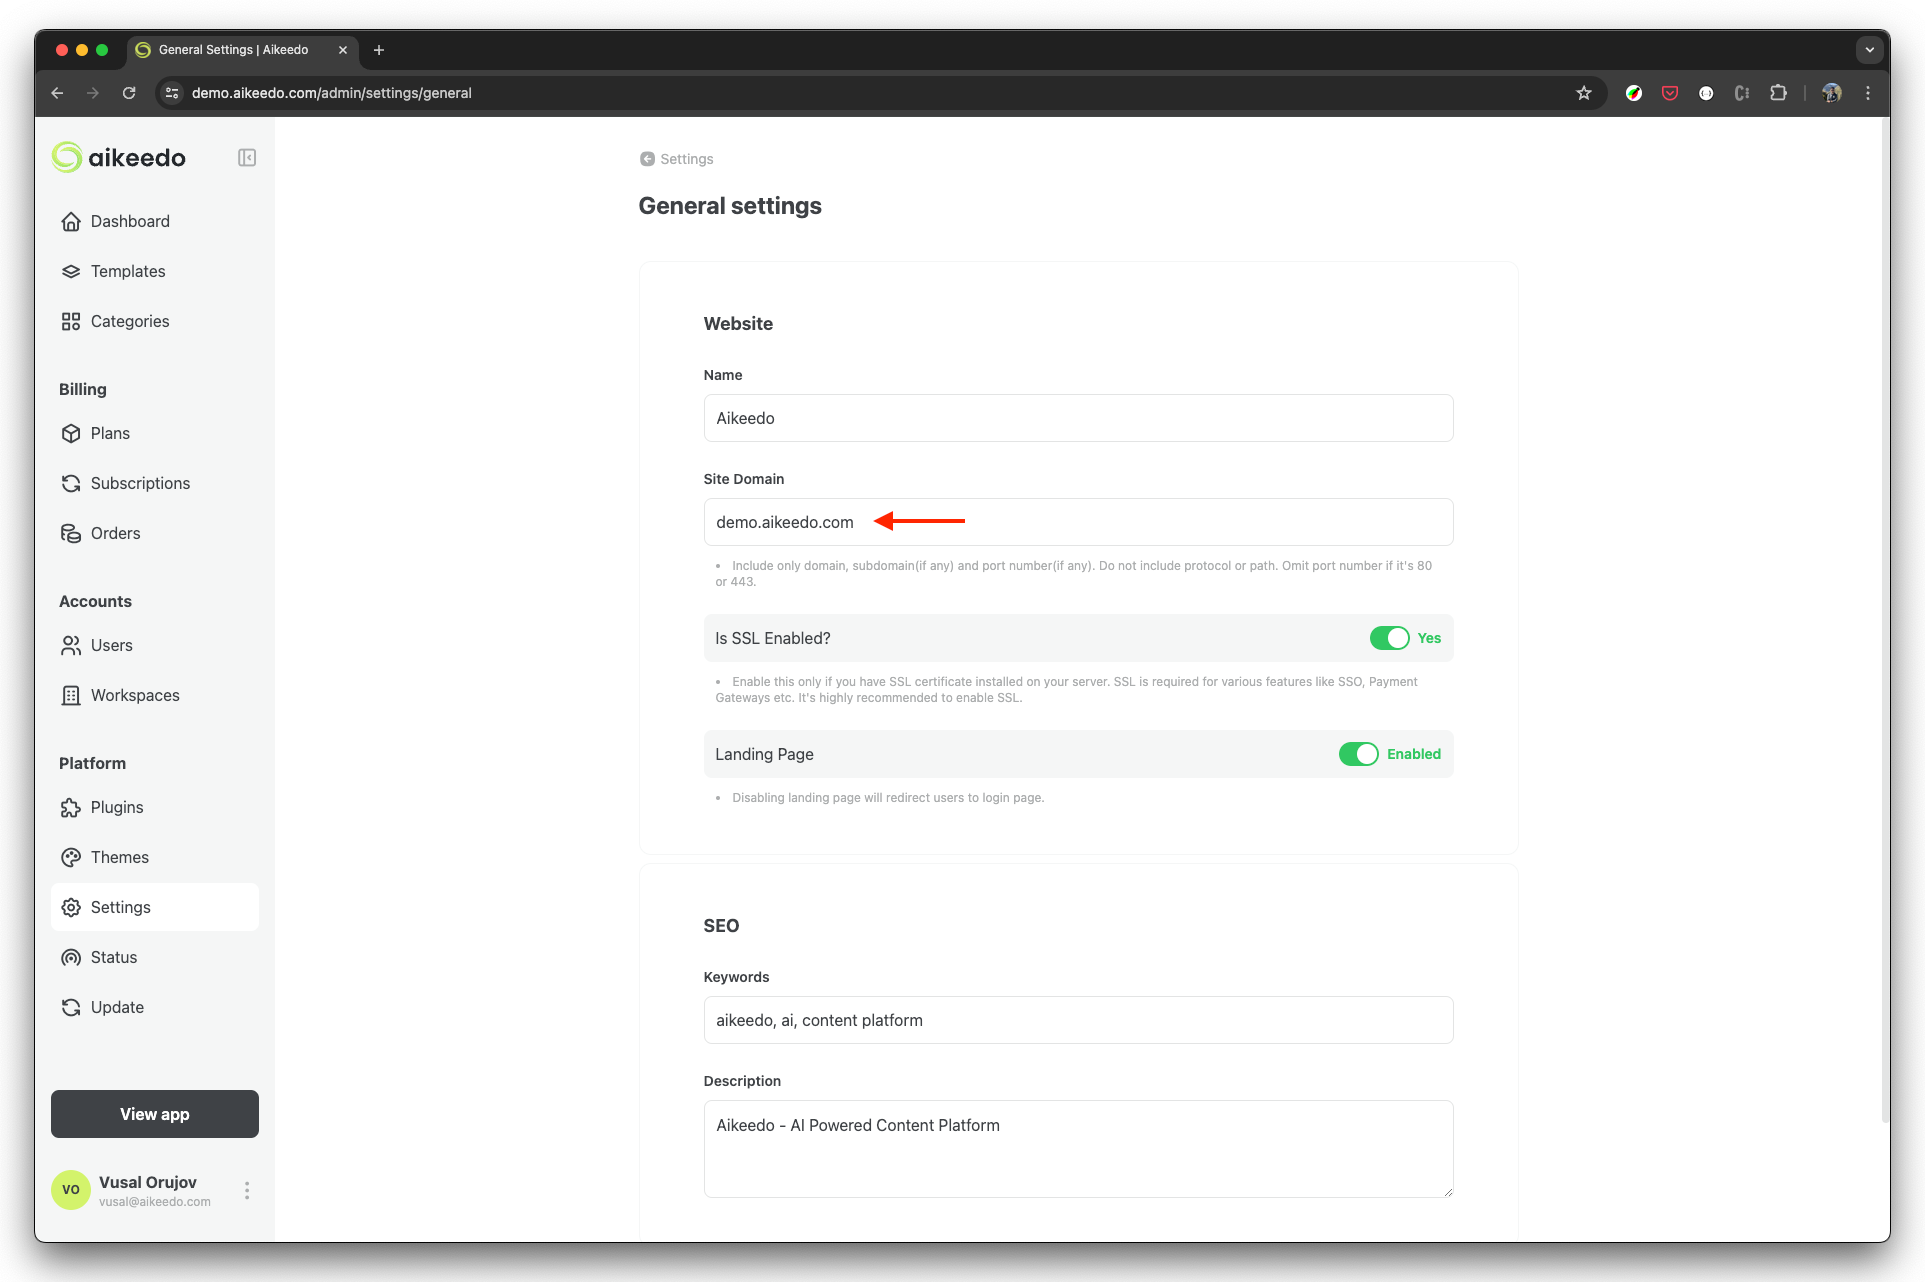
Include only the domain, subdomain (if any), and port number (if non-standard). Do not include protocols or paths. Omit the port number if it’s 80 (HTTP) or 443 (HTTPS).
SSL Configuration
Enabling SSL is highly recommended for security and is required for certain features.- Find the “Is SSL Enabled?” toggle in the General Settings.
- If you have an SSL certificate installed on your server, switch this to “Yes.”
Completing the “Getting Started” Section
After configuring your cron job and site domain, you’ll want to complete the “Getting Started” section in your admin dashboard.Completing the “Getting Started” section is crucial for ensuring all aspects of your Aikeedo installation are properly configured. Don’t skip this step!
Next Steps
After completing these initial setup steps, proceed to configure your application:Application Configuration
Complete guide to configuring all your Aikeedo settings
- Email Settings - Configure email delivery
- Billing Setup - Set up subscriptions and pricing
- Integrations - Connect AI providers and services
- Branding - Customize your platform’s appearance
Need Help?
If you need assistance with Aikeedo:Professional Support
Get expert help from our team with a paid support subscription
Troubleshooting Guide
Check common issues and solutions